How to Make Wind Energy at Home: A Step-by-Step DIY Guide
With the rising demand for clean and renewable energy, many people are turning to wind power as an eco-friendly way to generate electricity — even at home. While large wind farms dominate the renewable energy headlines, you can harness wind energy on a small scale right in your backyard or rooftop.
In this blog, we’ll walk you through how to make wind energy at home, including how wind power works, the tools you need, and how to build a basic DIY wind turbine.
What is Wind Energy?
Wind energy is the process of converting the kinetic energy of moving air into electrical energy using a wind turbine. As wind blows, it spins the turbine’s blades, which then drive a generator to produce electricity.
Why Use Wind Energy at Home?
Benefits:
- Lower electricity bills
- Clean and renewable energy
- Off-grid power backup
- Reduce carbon footprint
- Fun and educational DIY project
Things to Consider Before You Start
- Wind Availability: Ensure your location gets enough wind (at least 10–15 mph regularly). Open fields or rooftops are ideal.
- Local Regulations: Check zoning laws and permits in your area.
- Space and Height: More wind is available at greater heights.
- Budget: DIY wind turbines can cost from \$100 to \$1,000 depending on materials and output.
How to Make Wind Energy at Home – DIY Wind Turbine Guide
Materials You’ll Need:
- PVC pipe or wood for blades
- Small DC motor (used as a generator)
- Wooden or metal pole (mounting tower)
- Rectifier (to convert AC to DC)
- Battery (to store energy)
- Inverter (optional, to convert DC to AC)
- Wires and electrical tape
- Drill, screws, and basic tools
Step-by-Step Guide
Step 1: Build the Turbine Blades
- Cut 3–6 blades from PVC pipe (around 12–18 inches long).
- Shape the blades so they are slightly curved to catch the wind effectively.
- Drill holes at the base to attach them to the hub.
💡 Tip: More blades = more torque, but less speed. 3 blades are most efficient for small turbines.
Step 2: Create the Rotor Hub
- Use a small circular disk or wooden block as the hub.
- Attach blades to the hub evenly spaced using bolts or screws.
- Connect the hub securely to the shaft of the DC motor (which will act as the generator).
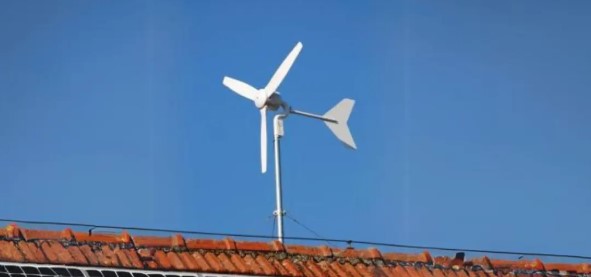
Step 3: Set Up the Tower
- Mount the motor and rotor assembly to the top of a pole or pipe (at least 6–10 feet tall).
- Make sure the turbine can rotate freely and face into the wind. Add a tail fin for wind direction if needed.
Step 4: Wiring the Generator
- Connect the motor output wires to a bridge rectifier to convert the variable AC output to DC.
- Then connect to a charge controller (optional but recommended for battery protection).
- Wire the output to a 12V battery to store the energy.
Step 5: Add an Inverter (Optional)
- If you want to power household appliances, connect a DC to AC inverter to the battery.
- This will allow you to use standard 120V/230V AC power for lights, fans, or phone chargers.
Step 6: Test the System
- Place the turbine in an open, windy area.
- Observe the blades spinning and check the battery voltage.
- Use a multimeter to measure how much electricity is being generated.
How Much Energy Can It Produce?
A small home wind turbine (DIY style) can produce anywhere between:
- 50 to 500 watts of power
- Enough to power LED lights, charge phones, or run small fans
For higher output (1kW–5kW), you’ll need a commercial wind turbine setup, higher towers, and larger blades.
Tips for Better Efficiency
- Place the turbine higher up for stronger wind (30+ feet if possible)
- Regularly clean and maintain the blades and wiring
- Use aerodynamic blade designs
- Avoid obstacles like buildings or trees nearby
Safety Precautions
- Use insulated wiring
- Avoid installing during stormy or windy weather
- Ensure all parts are securely fastened
- Use gloves and safety glasses during construction
Real-Life Uses of Home Wind Energy
- Lighting garden or outdoor areas
- Charging USB devices or power banks
- Powering a greenhouse or shed
- Supplementing solar power systems
Summary Table
| Step | Task |
|---|---|
| 1 | Build or cut turbine blades |
| 2 | Create hub and attach to motor |
| 3 | Set up a pole/tower for mounting |
| 4 | Connect generator to battery |
| 5 | (Optional) Add inverter for AC power |
| 6 | Test, observe, and use your wind energy |
Final Thoughts
Building a DIY wind turbine at home is a rewarding way to explore renewable energy while reducing your carbon footprint. With a little planning, some creativity, and basic materials, you can start producing clean electricity from something as simple as the wind.
Even if you begin on a small scale, it’s a powerful step toward sustainability and energy independence.